


Payment & Security
Your payment information is processed securely. We do not store credit card details nor have access to your credit card information.
Before Purchasing
Important: Please make sure that your smart key fob looks identical and matches any of the part numbers or FCC IDs listed below. Contact Us with your VIN if you don't have an existing remote for comparison.
Specifications
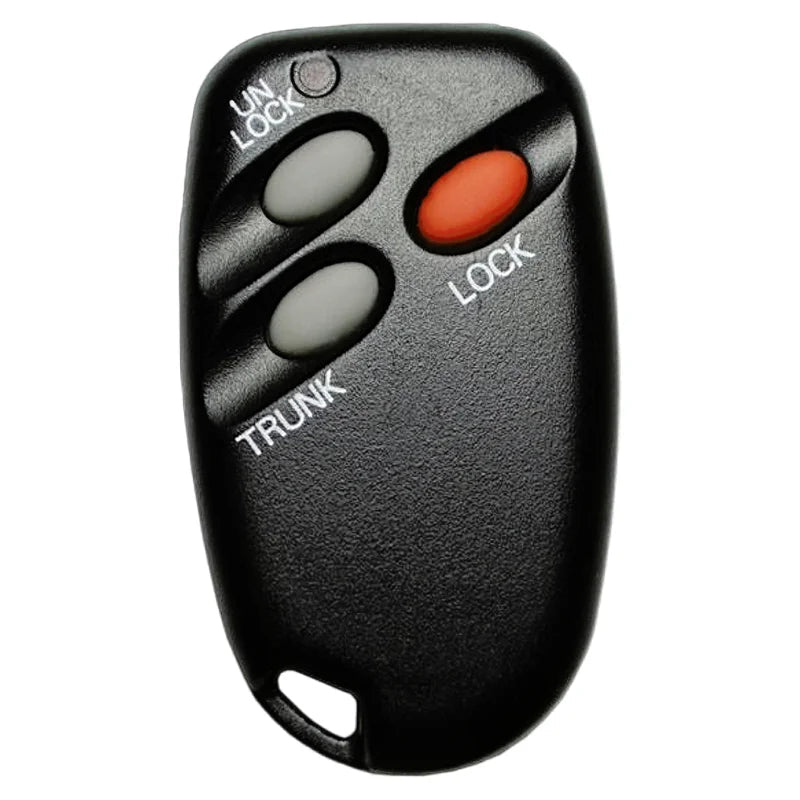
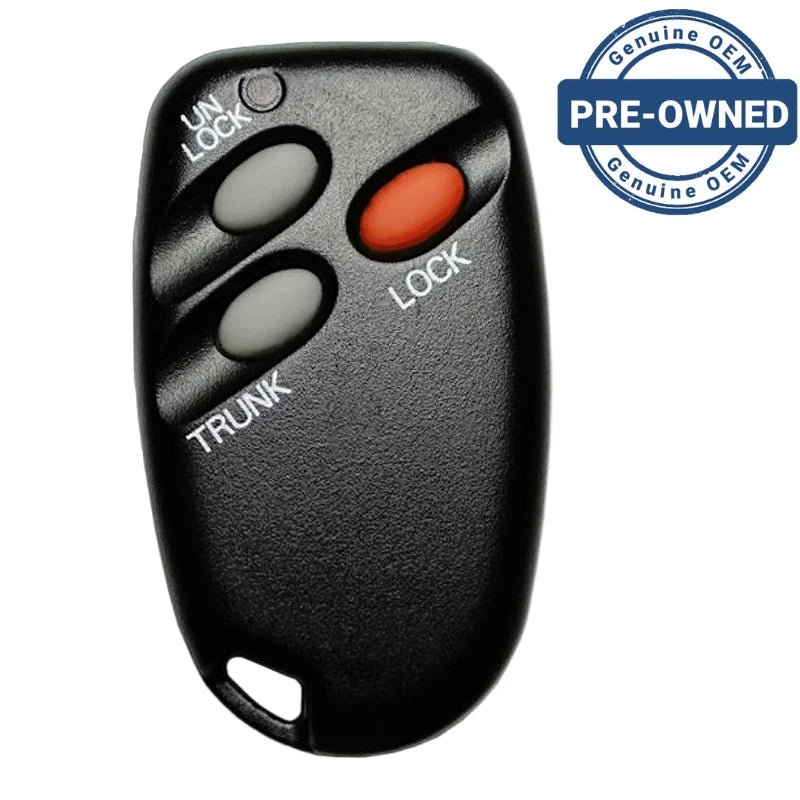
Part Numbers: MR123944 and MR122506
FCC ID: GQ43VT6T
Buttons:
Frequency:
Remote Programming:
Battery: (included)
Programming Procedure #409
- Locate the Data Line Connector (DLC) underneath the driver’s side dashboard. The DLC is typically located either to the left or the right of the steering column base. Use the figure to the side as a map for your DLC (they usually aren’t numbered). The view in figure b, is looking straight into the cavities of the DLC. Notice how the DLC is tapered on both ends: we will be working on the wider row of cavities (1 through 8 in figure b.).
- Insert keys in ignition and leave in the OFF position.
- Make sure there are metal contact pins in terminals 1 and 4 and connect the Data Line Connector (DLC) terminal 1 to terminal 4 with a suitable jumper wire (leave the jumper wire connected throughout the programming procedure). Make sure you know which terminals are 1 and 4.
- Within 10 seconds after connecting the jumper wire, turn the ignition switch to the ACC position and then back to OFF NOTE: The doors will automatically lock and unlock once indicating that the system is in the programming mode.
- Press either the LOCK or UNLOCK button on the transmitter to be registered three times within 10 seconds. Upon successful programming, the door will lock and unlock once.
- If there is a second transmitter, press the LOCK or UNLOCK button three times within one minute and the doors will lock and unlock once to confirm successful programming.
- Disconnect the programming wire and remove the keys from the ignition.

Compatibility
Estimate shipping
Return Policy Summary
Key fobs for 1996 Eagle Talon can vary depending on the trim level, which may lead to compatibility issues. You can explore alternative solutions listed below, or don't hesitate to contact us with your VIN for further assistance.
Frequently Asked Questions
At Remotes and Keys, we strive to process and ship orders as quickly as possible to ensure timely delivery to our customers. For items that are in stock, we typically ship the next business day. However, for items that are currently out of stock and are being restocked, the shipping time may take up to a week. Please note that for items that are out of stock and do not have an estimated time of arrival (ETA), they are temporarily unavailable, and we are unable to provide a specific shipping date.
We understand the importance of timely and reliable shipping, and we work hard to ensure that our customers receive their orders as soon as possible. If you have any questions or concerns about the status of your order, please do not hesitate to contact our customer service team. We are always happy to assist you and provide you with updates on your order.
It depends on where you are. Orders processed here will take 5-7 business days to arrive. Overseas deliveries can take anywhere from 7-16 days. Delivery details will be provided in your confirmation email.
Yes, we ship all over the world. Shipping costs will apply, and will be added at checkout. We run discounts and promotions all year, so stay tuned for exclusive deals.
No, the smart key remotes are not pre-programmed before shipping. In order for the smart key remote to function with your vehicle, your vehicle must be programmed to accept the remote.
If your vehicle supports an onboard programming procedure, you may be able to program the remote yourself by following the instructions provided on the product page and shipping package.
If your vehicle is not onboard programmable or if you need key cutting, we highly recommend seeking the assistance of a professional automotive locksmith rather than a dealership. Automotive locksmiths are trained and equipped to handle a wide range of vehicle key and remote programming needs, and they typically offer more competitive pricing than dealerships. The cost of their services is based on their local market and the expensive equipment used for key cutting and vehicle programming.
To program your new remote or key, an automotive locksmith will connect an expensive scan tool to your vehicle's computer and guide the vehicle through the programming process. We recommend using online resources such as www.autolocksmithfinder.com or your local yellow pages to locate a reputable automotive locksmith in your area.
We offer three types of smart key fobs: New OEM, Refurbished OEM, and New Aftermarket.
- New OEM smart key remotes are 100% original equipment manufacturer (OEM) products that come in the original package. In some cases, they may be out of the original package if the package was not available in a sealed condition.
- Refurbished smart key fobs are factory original equipment components reconditioned with a brand new emergency key, casing is either pre-owned or recased condition and may or may not include logo. They are fully tested and will function like their original equipment counterparts.
- New Aftermarket remotes are premium quality Avicero brand new aftermarket products with no logos. These remotes are made to our high-quality standards and are an excellent option for customers who prefer a lower-cost alternative to OEM products.
At Remotes And Keys, we take pride in offering a wide range of automotive locksmith supplies and resources to help our customers keep their vehicles secure and functional. We stand behind the quality of our products and are committed to providing exceptional customer service.
Any questions?
If we still haven't answered your question, you can contact us below and we will get back to you as soon as possible.